Like Streamyard, OBS Studio is a popular and free Broadcasting software commonly used for video recording and live streaming and it has versions compatible with most Operating Systems such as Windows, OS and Linux. Once installed, event organizers can easily use OBS to start broadcasting both pre-recorded or live content onto Peatix Live to start streaming to registered attendees only!
Setting up OBS
Step 1 – Make sure you’ve selected “Peatix Live” as the streaming method on your event page
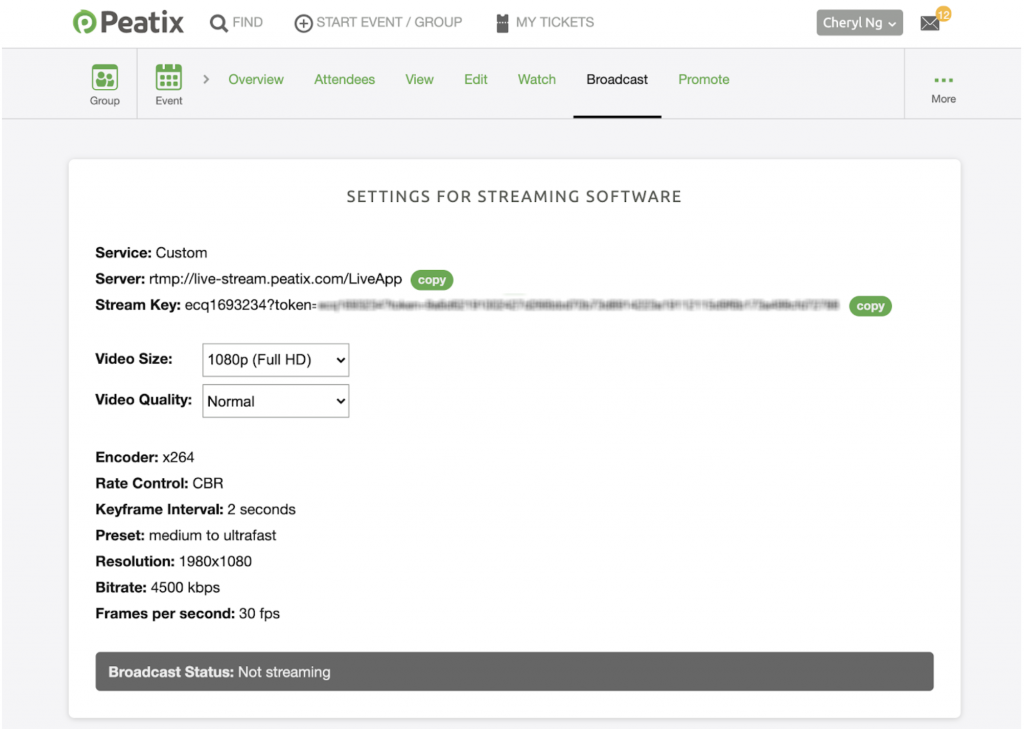
Once you’ve selected “Peatix Live” as the streaming method for your event, simply go to the “Broadcast” tab on your event page and you should see the following recommended settings.
Step 2 – Launch OBS, copy and paste “server URL” and “Stream Key” information from Peatix onto OBS
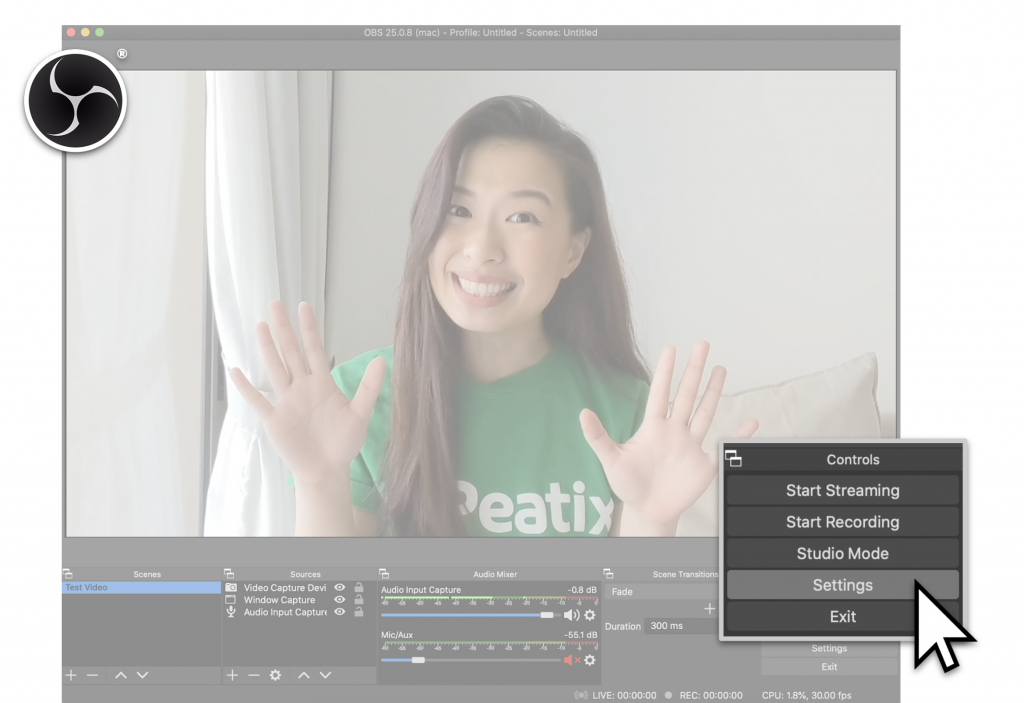
Launch OBS and at the bottom right-hand corner of the window, you should see “Controls” -> “Settings”. Click on “Settings” and on the left panel, select the “Stream” tab. Head back to your Peatix “Broadcast” page to copy the “Server” and “Stream Key” details, and paste them into the corresponding OBS fields.
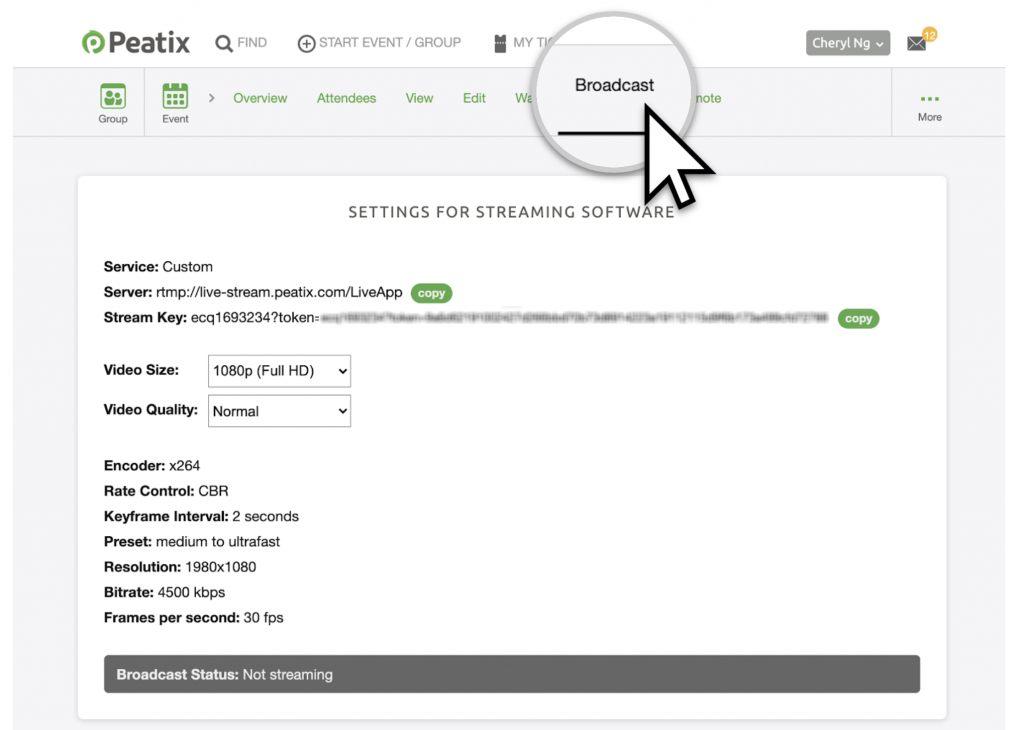
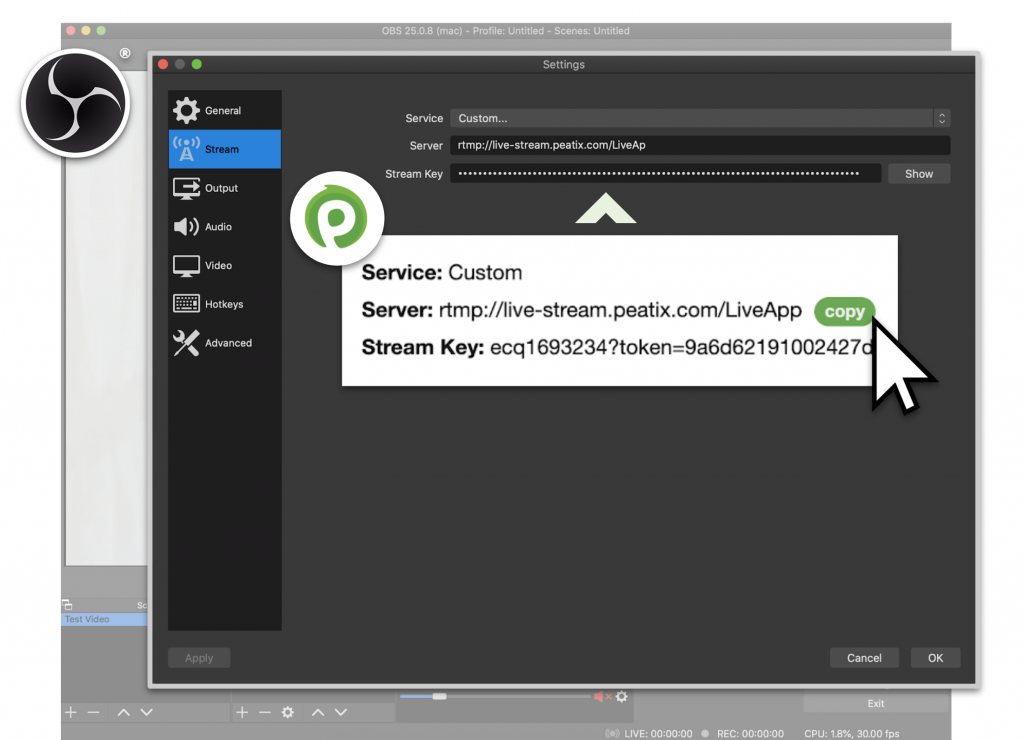
*Note that every event page generates a unique stream key, hence ensure this is the right event page you are planning to use for your Peatix Live event.
Step 3 – Copy and Paste details into “Output” tab
Once you are done with pasting the Server and Stream Key details, go to the “Output” tab on the left panel. Here, you will insert some of the other recommended settings shown in the Peatix Broadcast page, such as the “Encoder”, “Rate Control”, “Bitrate*”, “Keyframe Interval” and “CPU Usage Preset” information. Simply follow the recommended settings shown in the Peatix page and paste them accordingly in the same fields on the Output tab.
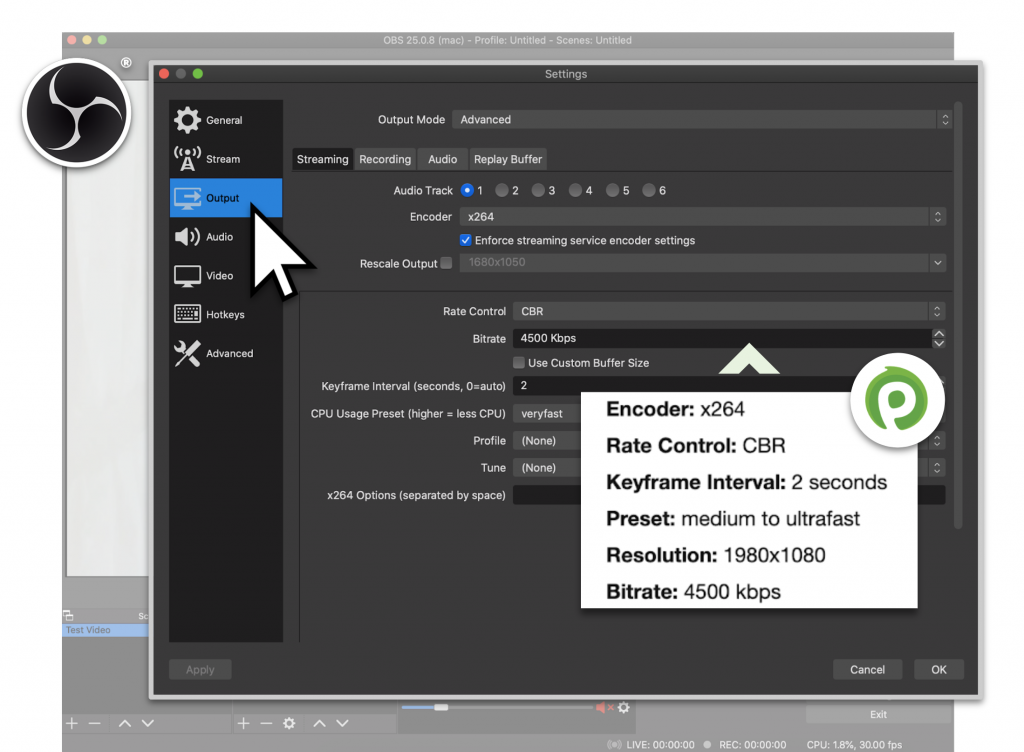
*The recommended bitrate of 4500 kbps works best if you’re streaming with a stable and high-speed internet. If your internet speed is less than ideal, try lowering the bitrate to 2500-3000 kbps for a smoother stream.
Step 4 – Copy and Paste information into “Video” tab
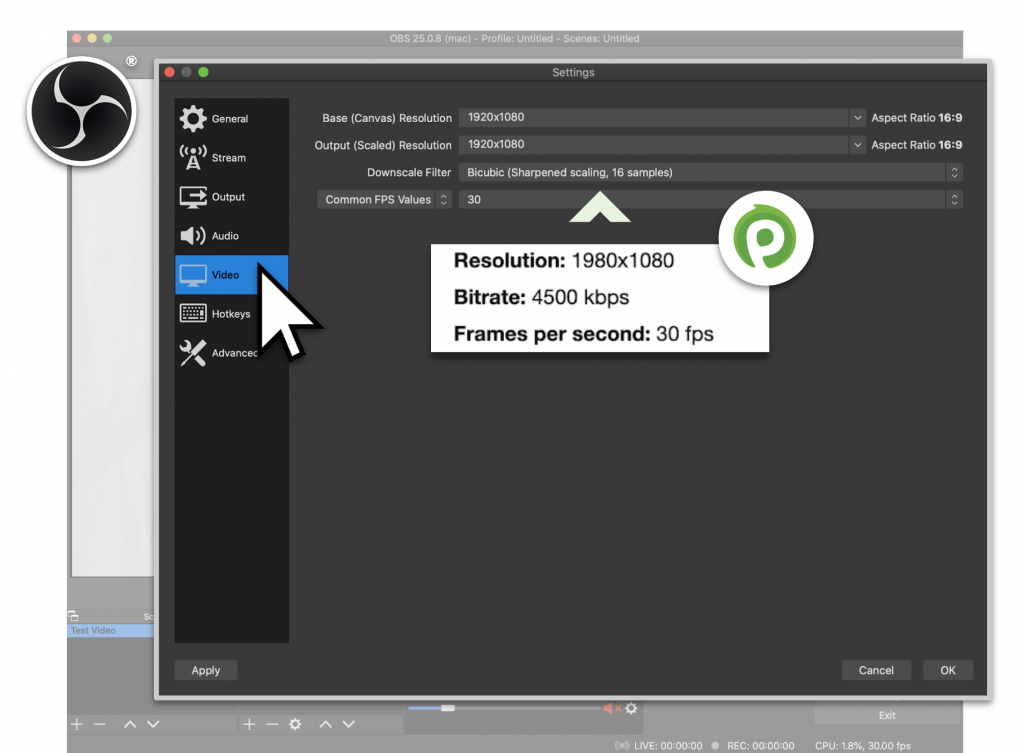
Next, select the “Video” tab on the left panel and change both the “Base” and “Output resolution”, as well as the “Common FPS value” as per the recommended settings on the Broadcast page.
Step 5 – Save settings
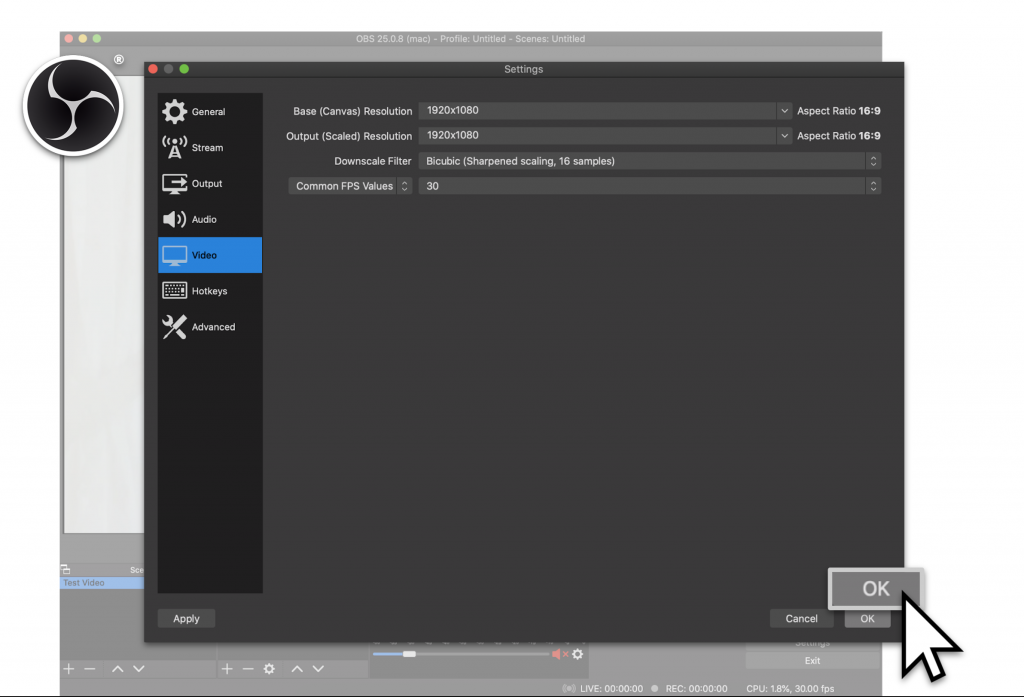
Once you have changed all the settings above, simply click “Ok” at the bottom right corner of the “Settings” screen to save the settings.
Adding content
Step 1 – Adding Pre-recorded Content
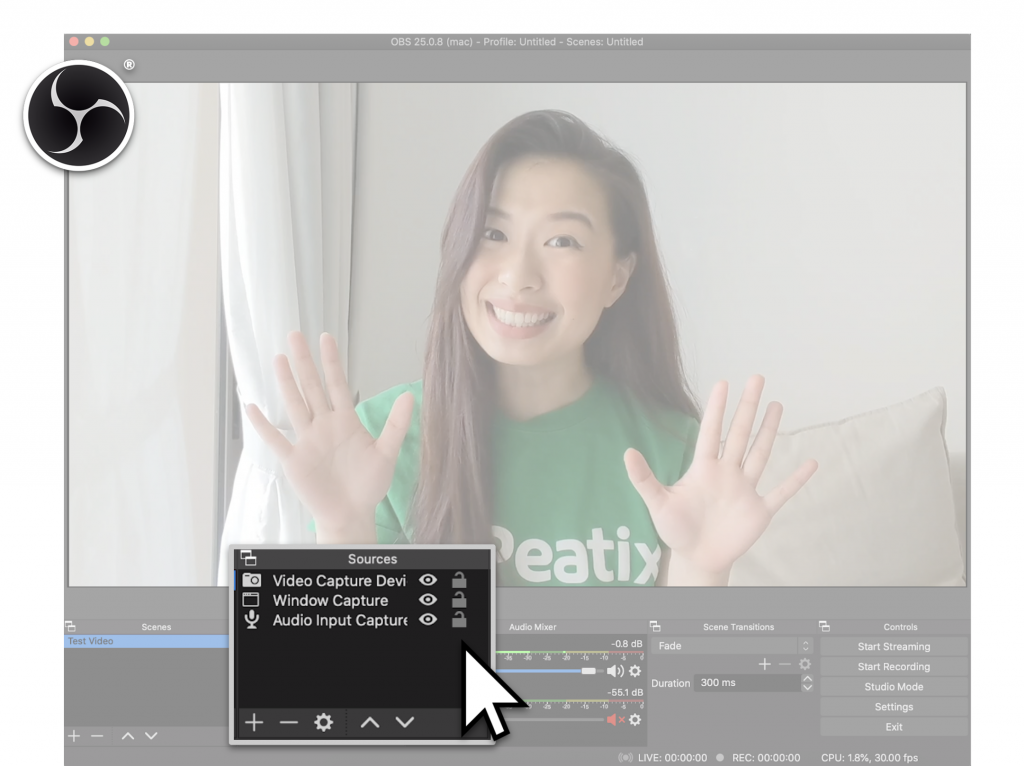
Now that you’ve customized your settings, it’s time to start adding the content to be streamed. To do that, simply work with the “Sources” tab at the bottom of the OBS home screen.
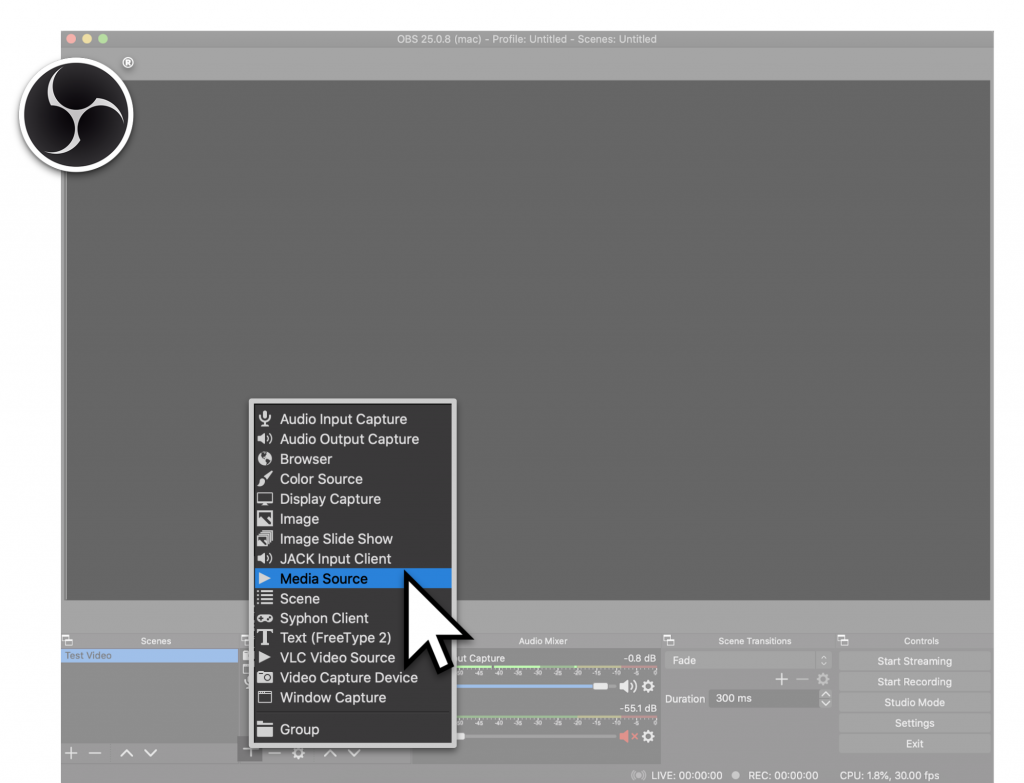
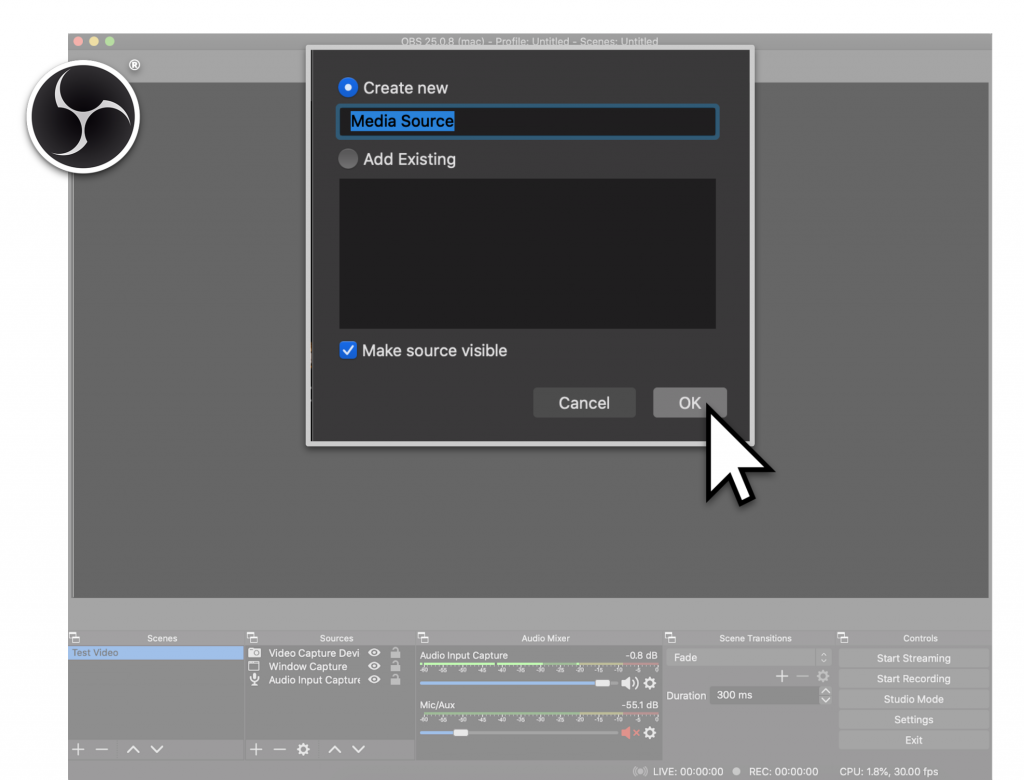
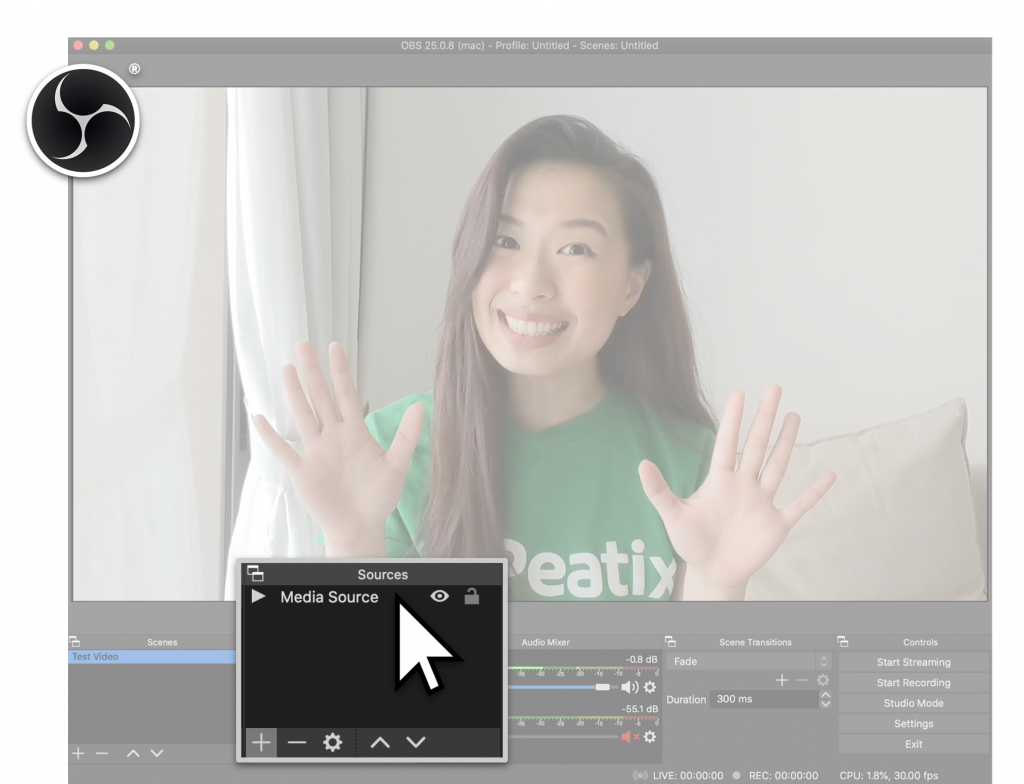
As mentioned earlier, OBS gives you the flexibility to stream both pre-recorded or live content. If you’re choosing to stream a pre-recorded video clip, simply click “+” at the bottom right corner of the “Sources” tab, select “Media Source” -> “Create New” and click “Ok”. A window will pop up for you to select the file you would like to upload. Simply click “Browse” to locate the file and select “Ok”.
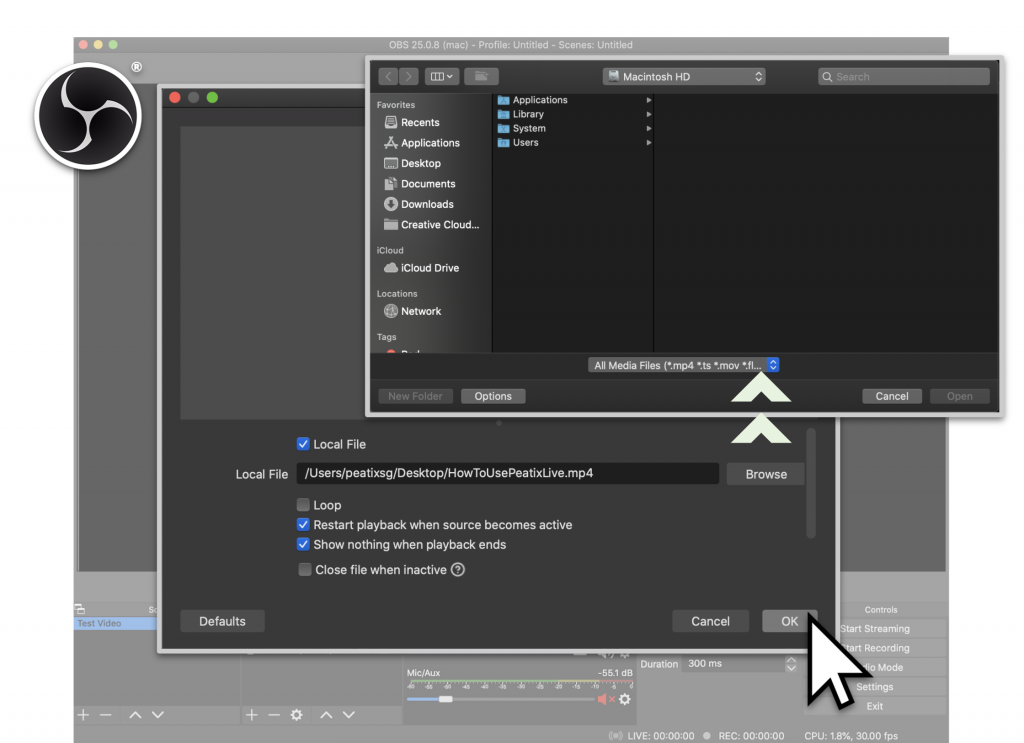
Once done, the “Source” tab should reflect your selected video as the “Media Source” you’ve chosen to stream.
Step 1a – Streaming Live Content
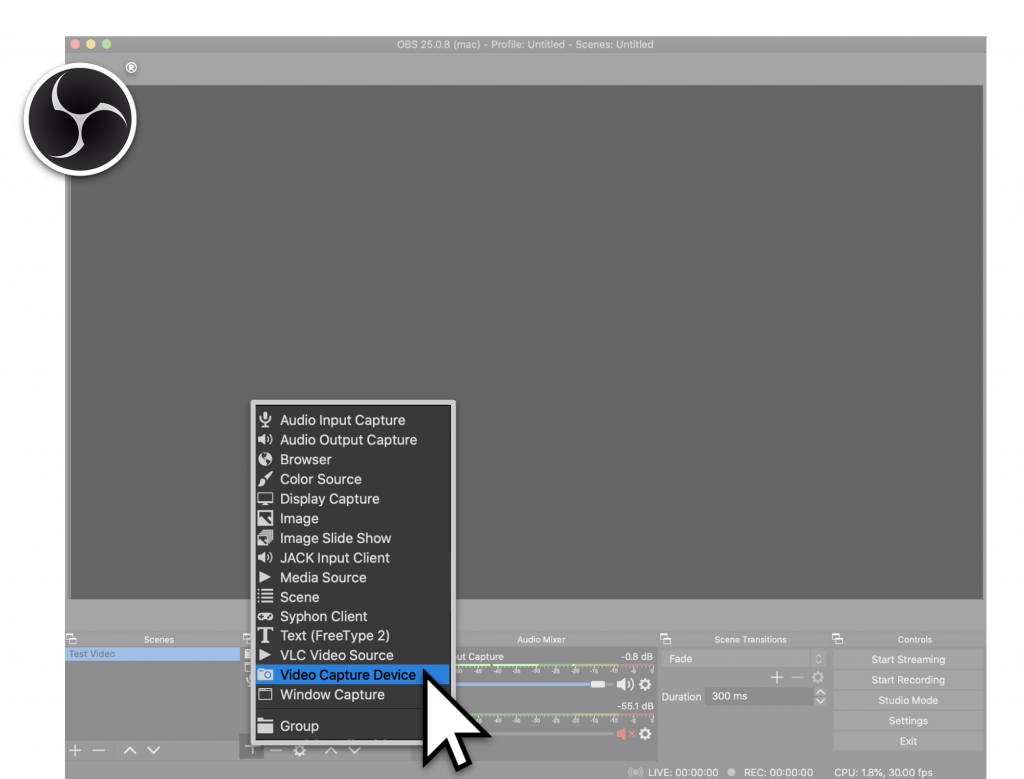
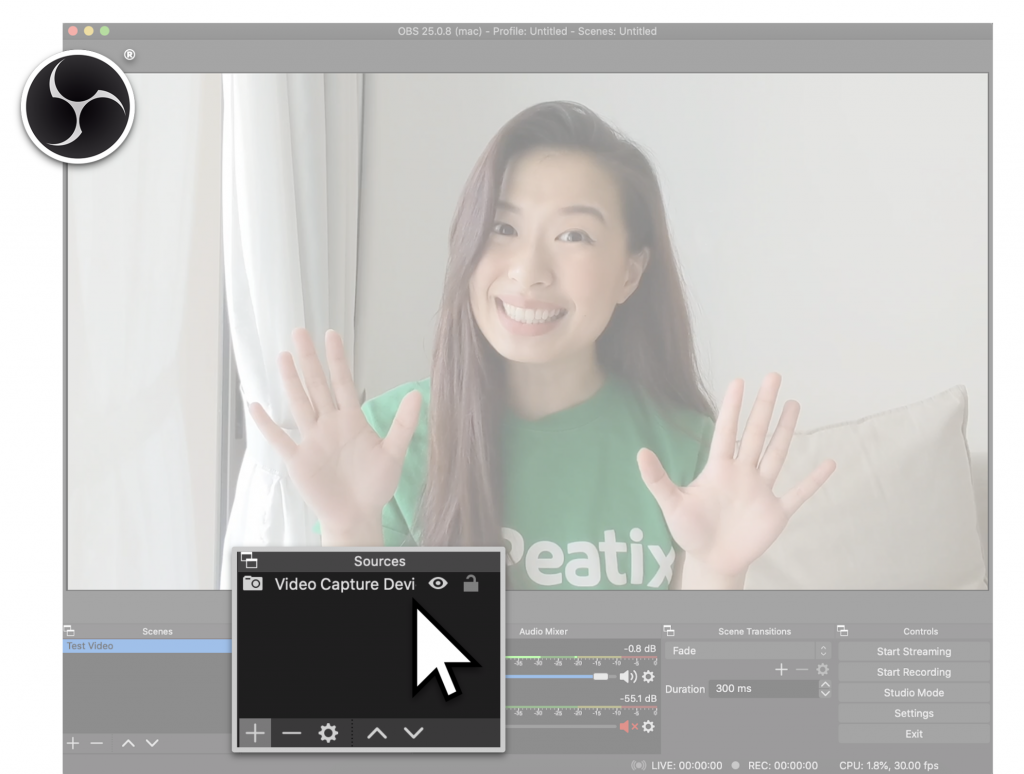
If you are planning to stream live content or to perform live via your webcam, inbuilt or external camera, under the “Sources” tab, click on “+” -> “Video Capture Device”. Select “Create New” and click “Ok”. Next, under “Device”, click on the dropdown menu, select the camera or device of your choice and select “Ok”. Here, you can also ensure that your “Preset” resolution follows the same resolution settings as recommended on the Peatix Broadcast page.
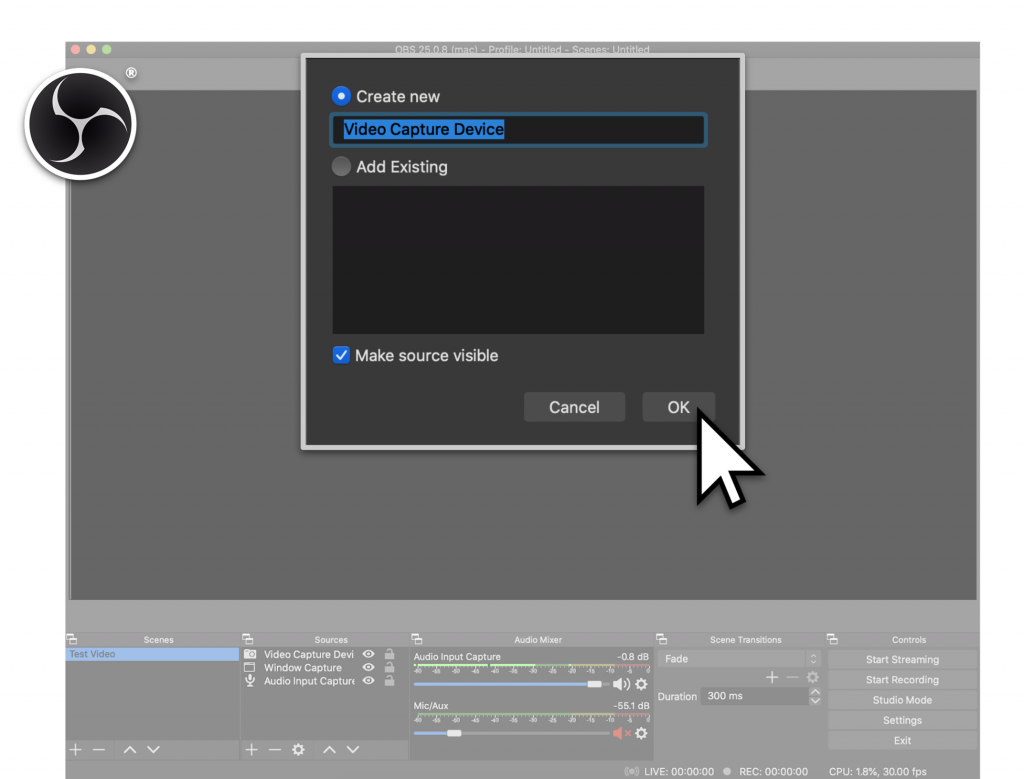
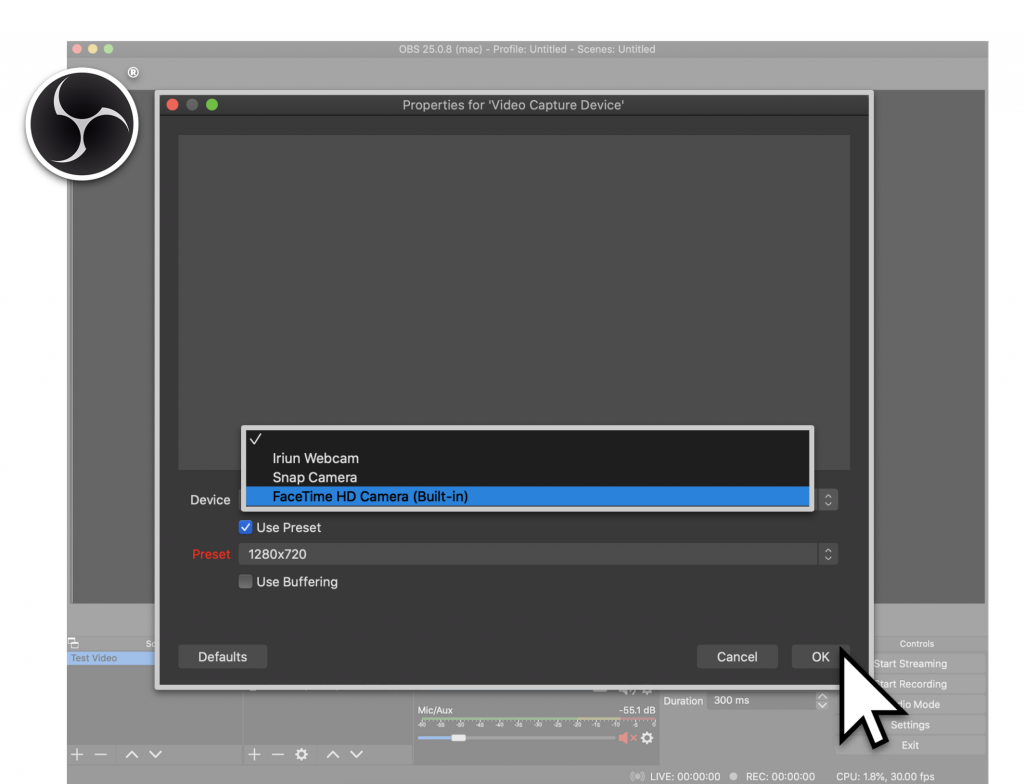
Once you’ve clicked “Ok”, “Video Capture Device” should appear under your “Sources” tab.
Step 1b – Adding audio to your live content
Now that you’ve got your camera in place, you’ll want to make sure that you’re not just seen but heard as well! The next step is to add an audio source, so audiences can hear you loud and clear.
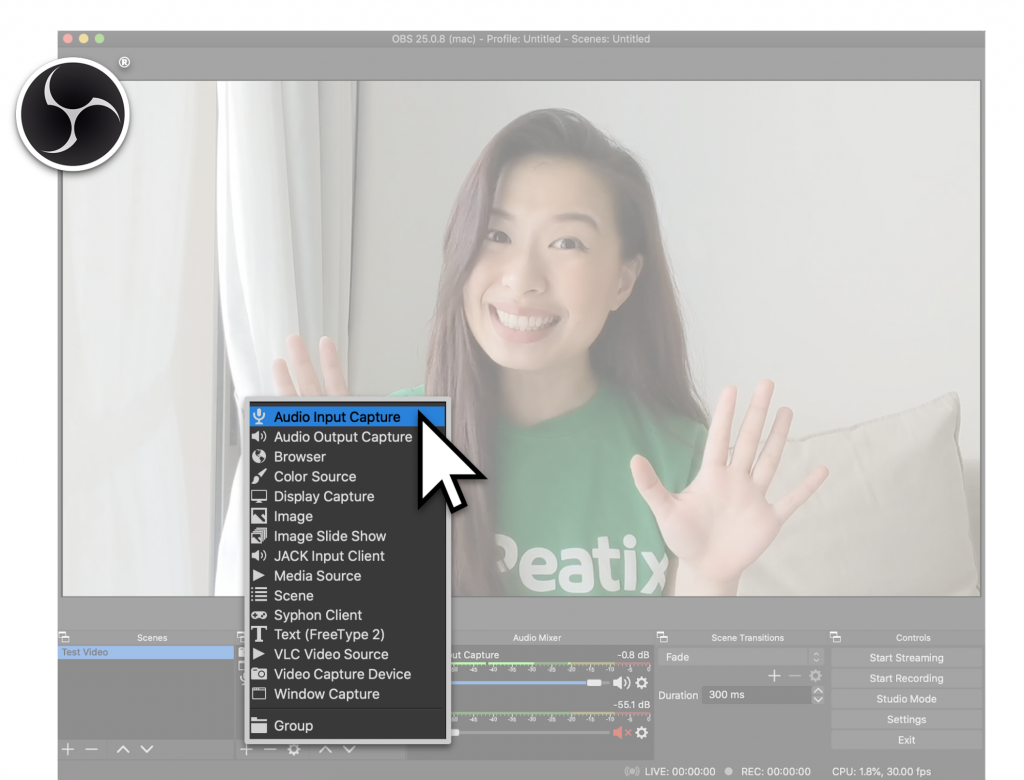
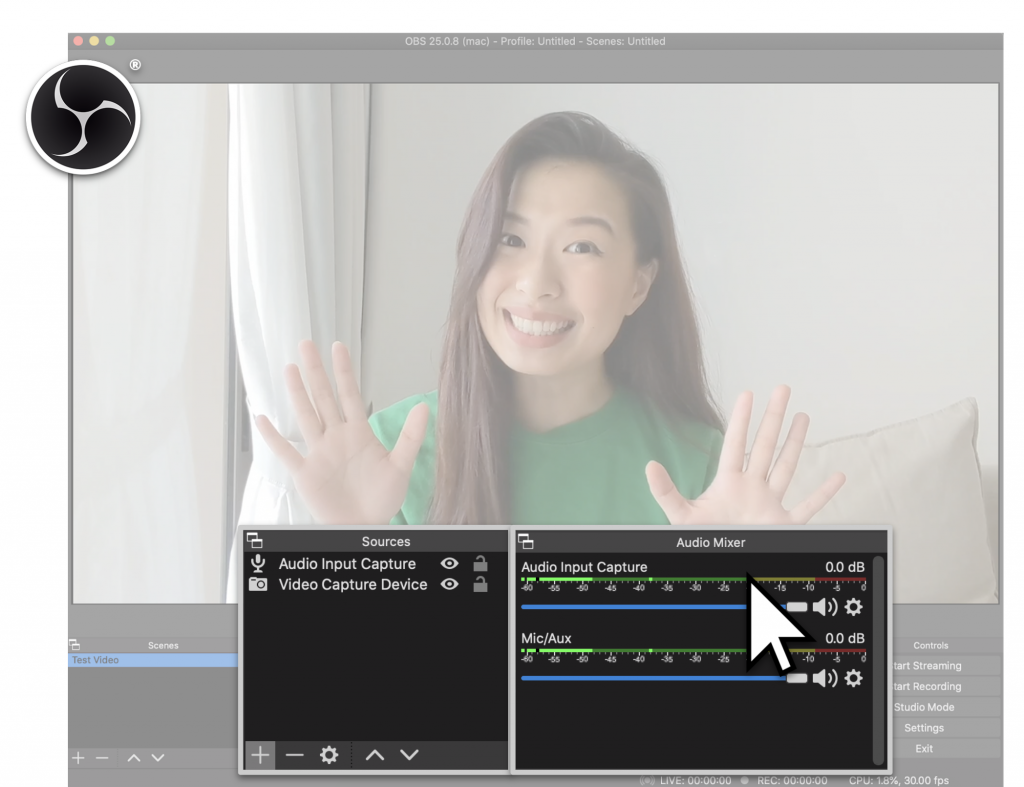
To do that, simply return to the “Sources” tab, click “+” and select “Audio Input Capture”. Select “Create New” and click “Ok”. Under “Devices”, choose the audio device, whether it is your computer’s in-built mic or an external device that you’ll be using for the stream and select “Ok”.
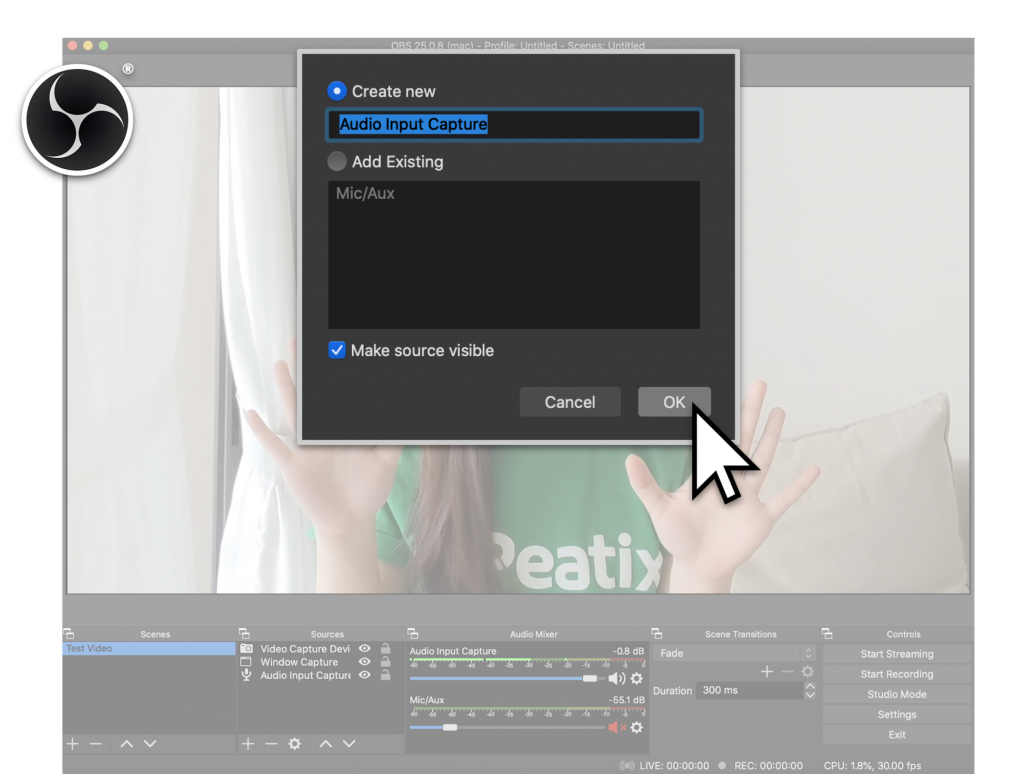
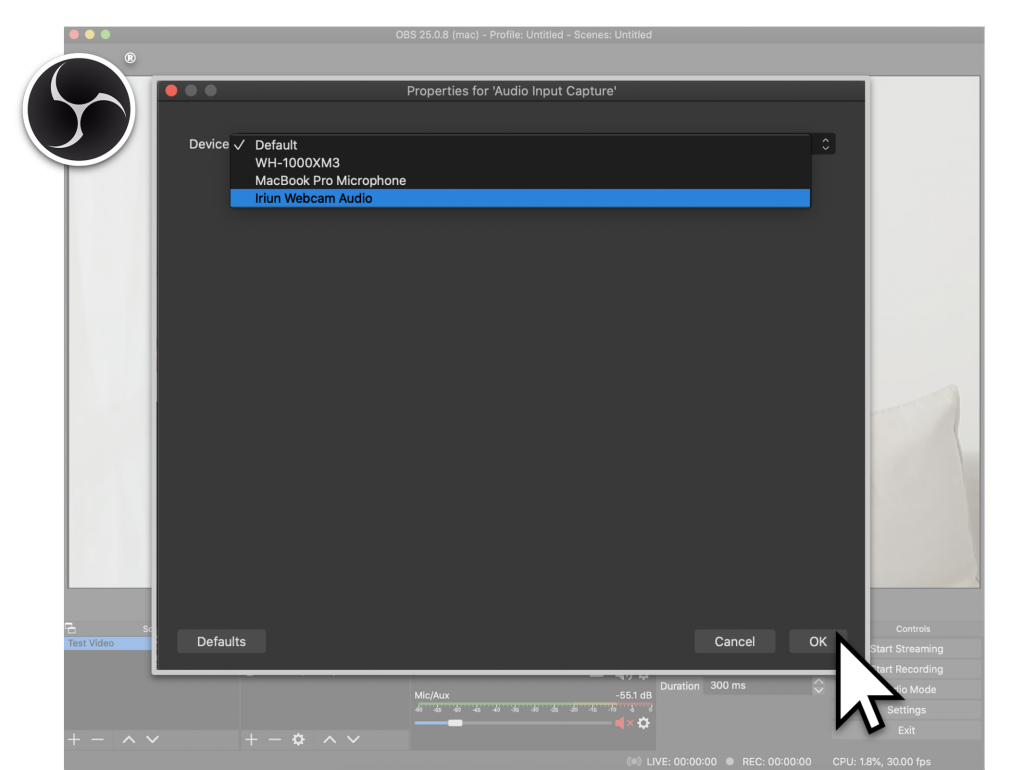
Once that is done, you should see the “Audio Capture Device” added to both the “Sources” and “Audio Mixer” tabs.
Going Live
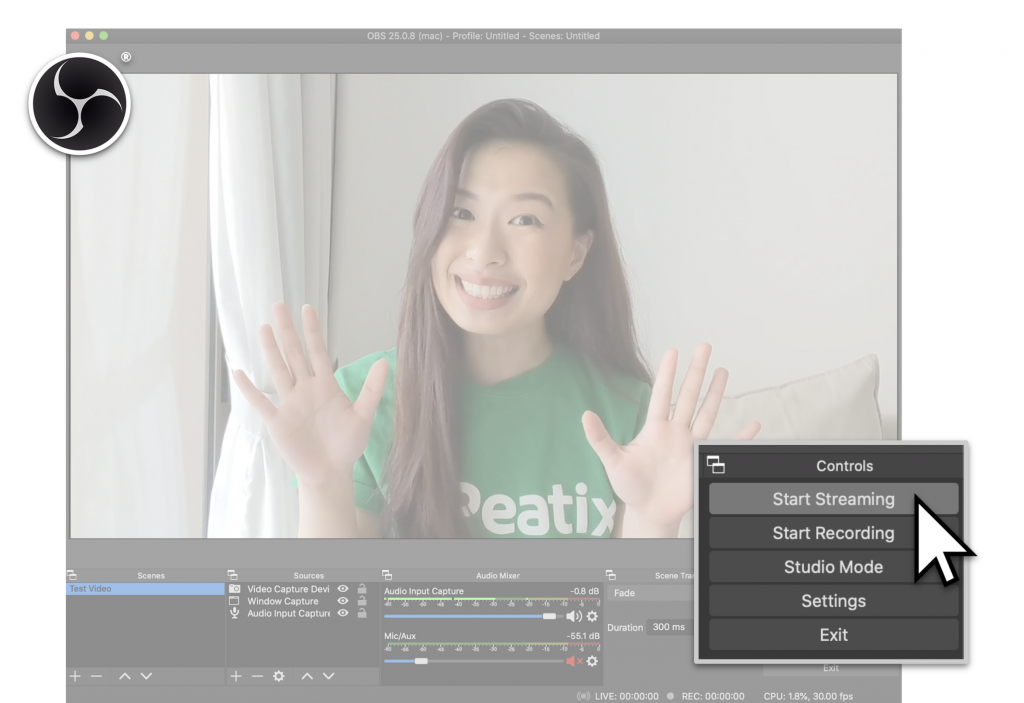
Now that you’ve got all your settings and content in place, you’re ready to start streaming and broadcasting onto Peatix Live! To go live, simply click on “Start Streaming” under the “Controls” tab at the bottom right corner of the OBS home screen. Tip! If you would like to record a copy of your stream content, you can also do so by selecting the “Start Recording” option in the “Controls” tab.
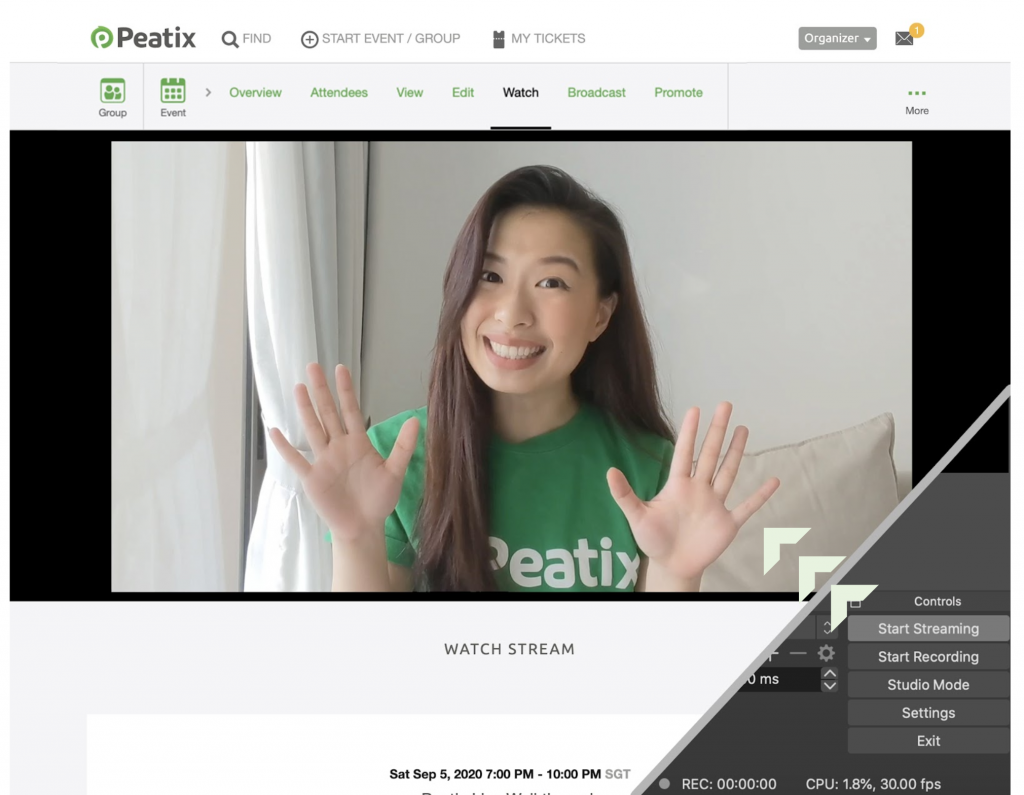
Once you’ve clicked on “Start Streaming”, give it approximately 10-15 secs for your content to start appearing on Peatix Live. To observe what is currently being broadcasted and streamed on Peatix Live, simply return to the Peatix page and click on the “Watch” tab.
Ending the stream
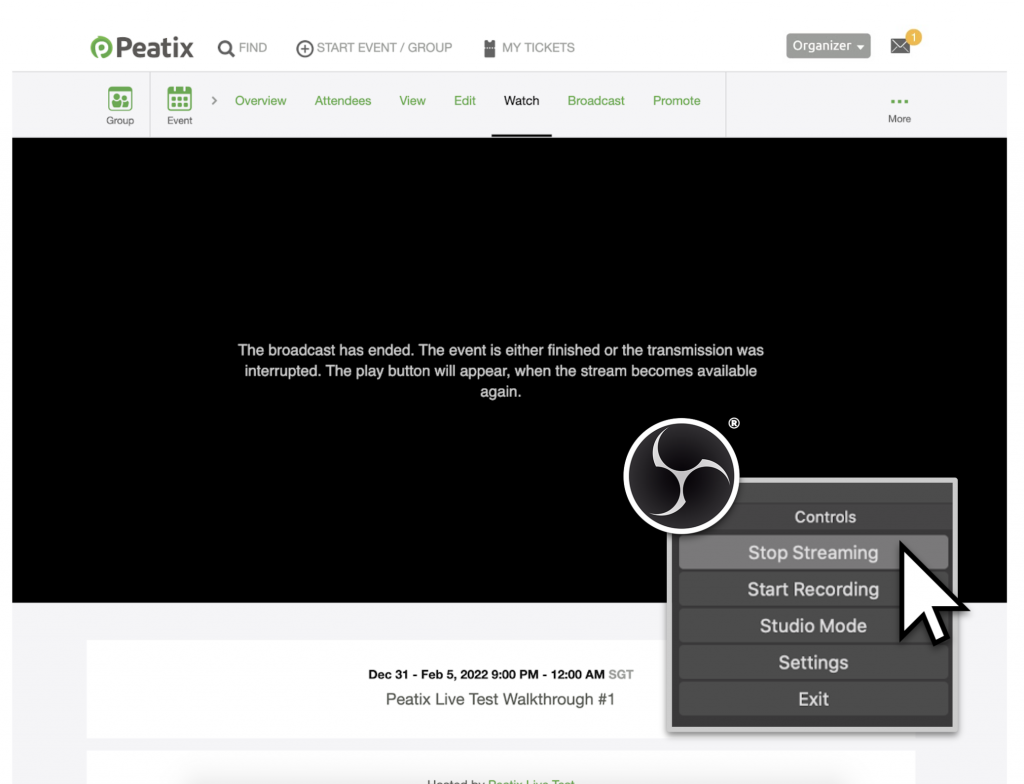
Ready to end the stream? Simply return to the “Controls” tab in OBS and click “Stop Streaming”.
Lastly, note that the recommended settings generated on your Peatix Broadcast page are dependent on the content quality you’d like to see streamed. However, if your internet connection or setup environment is less than ideal, you can also consider changing the “Video Size” and “Video Quality” options to generate lower recommended settings for input into OBS to better support your stream!
Have more questions about Peatix Live? Don’t forget to check out our FAQs here for more information.

